How to Use Agents in Your Applications on DigitalOcean Gradient™ AI Platform
Validated on 4 Mar 2025 • Last edited on 21 Jan 2026
DigitalOcean Gradient™ AI Platform lets you build fully-managed AI agents with knowledge bases for retrieval-augmented generation, multi-agent routing, guardrails, and more, or use serverless inference to make direct requests to popular foundation models.
You can access your agent through one of the following interfaces:
-
Endpoint: Endpoints are URLs automatically generated when you create agents. You can integrate them into your app to send requests to and receive JSON responses from. Similar to a chatbot interface, you can send the agent a string of text that the agent processes and responds to. Using an endpoint also allows you to configure additional request parameters, such as maximum tokens to generate and retrieval information settings. Agent endpoints can be private or public:
-
Private: Agent endpoints are private by default. This means only other resources in your account, such as other agents or functions or requests authenticated with an access key can access the agent.
-
Public: Public endpoints allow you to access and use the chatbot embed feature. You do not need to set up an access key to use an embedded chatbot, however, like private endpoints, requests sent directly to an agent’s endpoint still require an access key.
-
-
Chatbot: Chatbots allow users to interact with your agent through a chatbot interface that you embed into your site using a snippet of HTML code. The chatbot interface is available only if the agent’s endpoint is public.
Using an endpoint or a chatbot depends on your use case. If you want to integrate your agent into a customized user interface or use it to produce content for your website, an endpoint is a good option. If you want to create a basic technical support chatbot for your company’s website, an embedded chatbot is a better option.
View Agent Endpoint
You can access the agent’s endpoint URL and its availability status in the control panel or by using the API.
Using the Control Panel
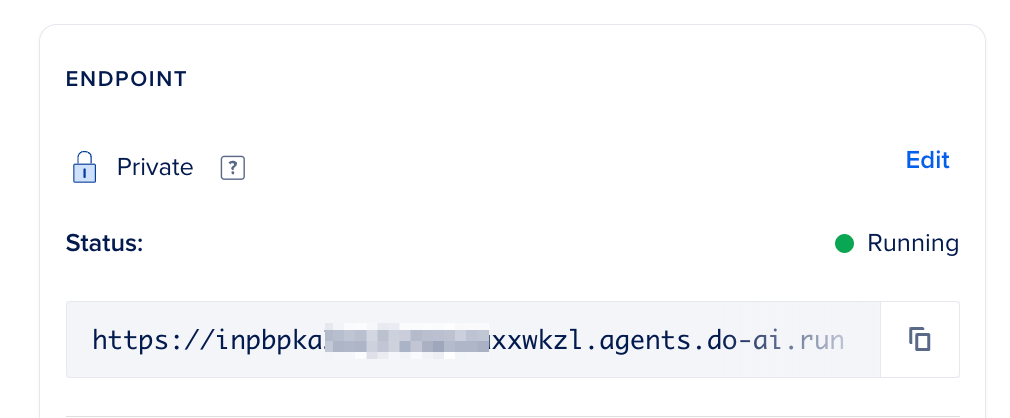
You can view an agent’s endpoint URL and its availability status in the ENDPOINT section of the agent’s Overview tab in the DigitalOcean Control Panel.
Using Automation
Viewing an agent endpoint requires the unique identifier for the agent. To obtain a list of agents with their unique identifiers, use the /v2/gen-ai/agents endpoint.
The agent endpoint URL and availability status are returned in the deployment.url and deployment.visibility fields, respectively:
...
    "deployment": {
            ...
            "uuid": "3c683438-xxxx-xxxx-bf8f-4e013e2ddde4",
            "url": "https://qdvqcnyeeqt7td46j26foyxx.agents.do-ai.run",
            "status": "STATUS_RUNNING",
            "visibility": "VISIBILITY_PRIVATE",
            ...
        },
Change Your Agent’s Endpoint Availability
Before using your agent, we recommend setting the endpoint’s availability to determine who can access it and what interfaces are available. You can set the endpoint to either private or public.
Using the Control Panel
To change endpoint availability in the DigitalOcean Control Panel, click Agent Platform in the left menu. Then, in the Workspaces tab, select the workspace that contains the agent you want to set an endpoint for and click the agent. In the ENDPOINT section of the Overview tab, click Edit to open the Set endpoint availability to private window. Select the availability you want and click Save.
Using Automation
Changing an agent endpoint requires the unique identifier for the agent. To obtain a list of agents with their unique identifiers, use doctl genai agent list or the /v2/gen-ai/agents endpoint.
To use the public endpoint in your app, copy the URL from the url field returned in the response:
...
"deployment": {
"uuid": "3c683438-xxxx-xxxx-bf8f-4e013e2ddde4",
"url": "https://qdvqcnyeeqt7td46j26foyxx.agents.do-ai.run",
...
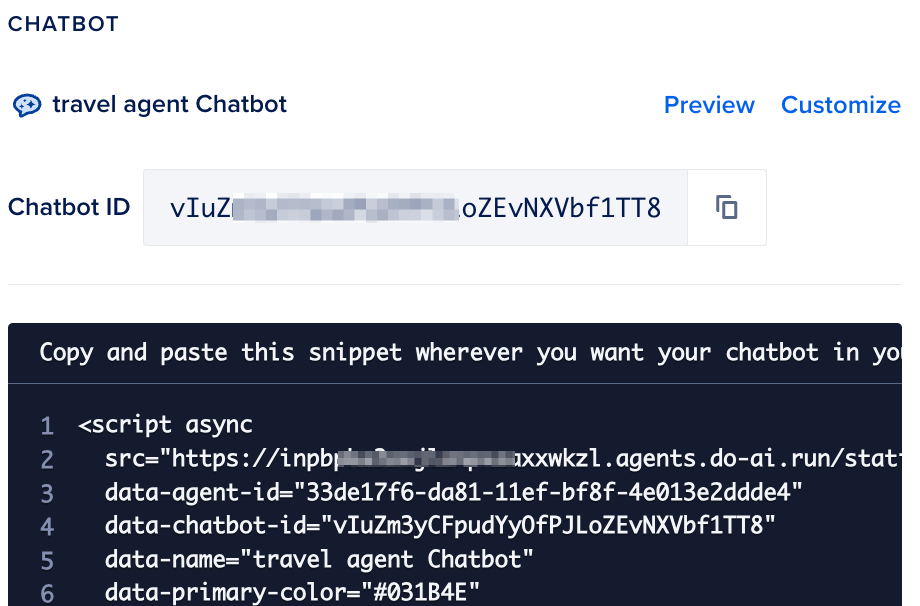
},Setting the endpoint to public also displays a Chatbot section with the chatbot ID and a JavaScript code snippet in the Overview tab in the control panel. You can copy and paste the code snippet directly into your application, such as WordPress, to use the chatbot. To learn more, see the community articles on adding chatbots.
Create an Access Key for an Endpoint
To access an agent’s endpoint from an external source outside of DigitalOcean, you need create an access key. Access keys are used to authenticate requests to the agent’s endpoint.
Using the Control Panel
To create the access key from the DigitalOcean Control Panel, click Agent Platform in the left menu, then in the Workspaces tab, select the workspace that contains the agent you want to create an access key for. In the agent’s Overview page, click the Settings tab. In the Endpoint Access Keys section, click Create Key to open the Create Agent Access Key window. Provide a name for the key in the Key name field and click Create to see your newly created key. Then, copy the secret key and securely store it. We do not show it again for security reasons.
Once you have the key, you can integrate it into your app to authenticate requests.
Using Automation
Creating an agent endpoint access key using the DigitalOcean API requires the unique identifier of the agent and a name for the key. To obtain a list of agents with their unique identifiers, use use doctl genai agent list or the /v2/gen-ai/agents endpoint.
You can list all agent API keys, regenerate a key, or update a key after creation.
Use Agent’s Endpoints
Once you have an agent, you can use the agent’s endpoint to generate responses to user queries. The following cURL request and Python OpenAI examples show how to use the agent’s endpoint to generate responses to user queries.
You can send requests to the endpoint’s API by appending /api/v1/chat/completions to the end of the URL and sending a JSON request body, like in this example cURL request:
curl -i \
  -X POST \
  $AGENT_ENDPOINT/api/v1/chat/completions \
  -H "Content-Type: application/json" \
  -H "Authorization: Bearer $AGENT_ACCESS_KEY" \
  -d '{
    "messages": [
      {
        "role": "user",
        "content": "What is the capital of France?"
      }
    ],
    "stream": false,
    "include_functions_info": true,
    "include_retrieval_info": true,
    "include_guardrails_info": true
  }'
In the example, you send a request to the agent’s endpoint to generate a response to the user’s question What is the capital of France?. It uses AGENT_ENDPOINT and AGENT_ACCESS_KEY environment variables to authenticate the request, and includes response citations.
Each endpoint has its own API documentation that you can access by appending /docs to the end of the URL. For example, https://<agent-indentifier>.ondigitalocean.app/docs. The documentation contains a rendered OpenAPI specification of all available request body parameters and response schemas.
The following example shows how to use the OpenAI Python library to send a request to an agent’s endpoint.
This script sends a request to an agent’s endpoint to return the name of France’s capital in JSON format in the console and its retrieval information. It uses agent_endpoint and agent_access_key environment variables to authenticate the request. You do not need to append /chat/completions to the end of the endpoint URL when using the openai library.
Include Response Citations
When sending a POST request to the $AGENT_ENDPOINT/api/v1/chat/completions endpoint, you can view the agent’s retrieval information in the response by setting the following retrieval parameters to true in the request body:
include_retrieval_info: Includes the knowledge bases and subsequent files accessed to generate the response.include_functions_info: Includes a list of functions used to generate the response.include_guardrails_info: Includes a list of guardrails used to generate the response and the reasons why the guardrails were triggered.
The retrieval object in a response looks like the following:
{
    "retrieval": {
        "retrieved_data": [
            {
                "id": "...",
                "index": "...",
                "page_content": "some text",
                "score": -9549511700,
                "filename": "file name or url",
                "data_source_id": "...",
                "metadata": {...additional metadata for chunk}
            },
        ]
    },
    "guardrails": {
        "triggered_guardrails": [
           { rule_name: "sensitive_data", message: "what trigggered it" }
         ]
    },
    "functions": {
        "called_functions": ["get_weather"]
    },
}
Use Chatbot Interface
To embed the chatbot widget on public sites, set your agent’s endpoint to public. Setting the endpoint public displays a CHATBOT section with an HTML <script> element code snippet. You can directly embed the snippet in your application, such as a WordPress or static HTML website, to use the chatbot. The embed code looks like this:
<script async
  src="https://<agent-indentifier>.ondigitalocean.app/static/chatbot/widget.js"
  data-agent-id="<agent-data-indentifier>"
  data-chatbot-id="<agent-chatbot-indentifier>"
  data-name="My Chatbot"
  data-primary-color="#031B4E"
  data-secondary-color="#E5E8ED"
  data-button-background-color="#0061EB"
  data-starting-message="Hello! I am an AI agent. How can I help you today?"
  data-logo="https://example.com/your-logo.svg">
</script>
You cannot view retrieval information in the chatbot interface.
Customize the Chatbot
The code snippet contains several parameters that you can customize for your application. For example, customize the chatbot’s appearance and behavior such as the chatbot’s name, colors, logo, and starting message. Embed the code snippet in your application, and then directly modify the parameters in the snippet. For example, to change the chatbot’s name, modify the data-name parameter. To add a chatbot logo, upload an image to your website and then set the data-logo parameter to the image’s URL. You do not need to treat the data-agent-id and data-chatbot-id fields as secrets.
Alternatively, in the CHATBOT section of the in the control panel, click Customize to open the Customize chatbot design window and modify the settings.
Add Allowed Domains
For enhanced security with the chatbot, we strongly recommend that you add allowed domains. Doing so ensures that your agent endpoint can only be reached through those approved domains.
In the Chatbot security section of the Customize chatbot design window, add the domains where you want to embed this chatbot. You can add multiple domains, separated by commas.

Leaving this field blank means your chatbot code can be embedded on any website.